These easy steps will guide you on how to resize images in Windows 10 using Paint.
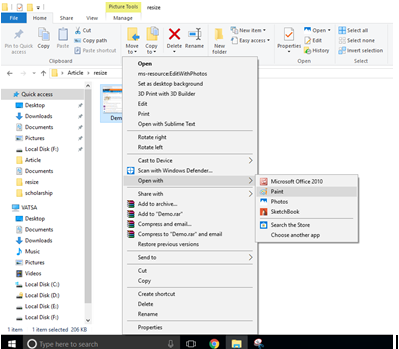
- Right-click the desired image.
- Then, select Open with.
- After that select Paint.
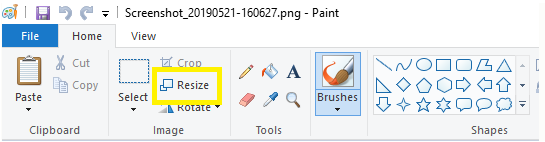
- Now click the Resize key located on the top corner of the window.
- Now, choose the Pixels or Percentage option.
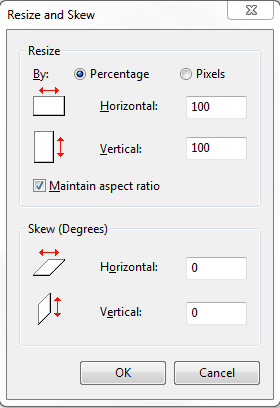
- Then, check the Maintain aspect ratio box if you want to uphold the existing aspect ratio of the picture.
- Enter the preferred utility into the Horizontal or Vertical area.
- Click OK.
- Save the image
You can easily resize the image using Paint 3D for Windows 10.
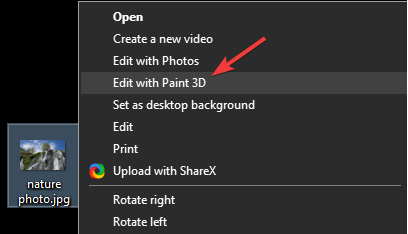
- Open the image in Paint 3D that you want to resize.
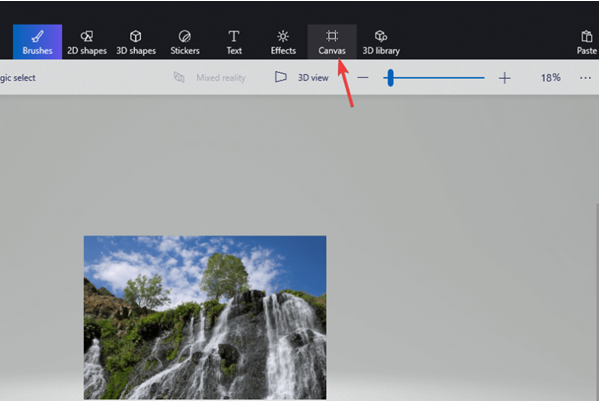
- Now, click Canvas.
- Verify Resize image with canvas option is checked.
- Don’t forget to check the Lock Aspect Ratio option located below Resize Canvas.
- Now, select Pixels.
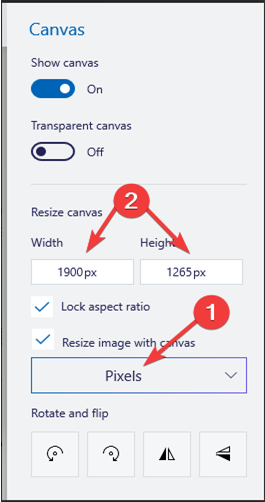
- Select a suitable size by changing the height and width.
- Now, click the menu key.
- In the end, choose Save.
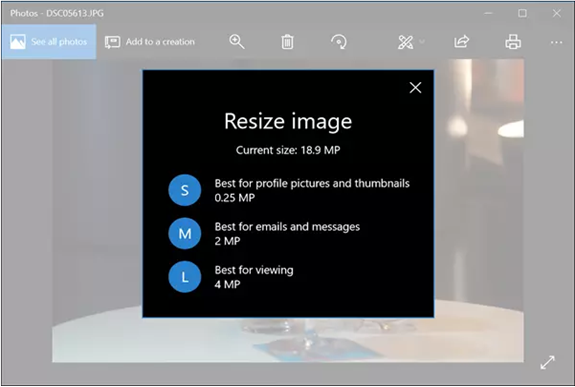
Photo App works as an Image Resizer for Windows 10. It provides three as a default option to change the size of an image.
- S – Small -Commonly used for thumbnails, and Profile Pictures. (0.25 MP)
- M – Medium -Used for email purposes. (2 MP)
- L – Large – Up to the mark for screening. (4 MP)
- Double-click the image that you want to resize. The Window will open it in the Photos app by default.
- Click the 3 dotted option located at the top right corner of the window. After that, select the Resize option. A window will pop-up after selecting the Resize option. It will also show the current size of the image.
- Select the desired resizing option.
- In the end, select the desired path and name of the image to Save it. After that, you can exit the Photo app.
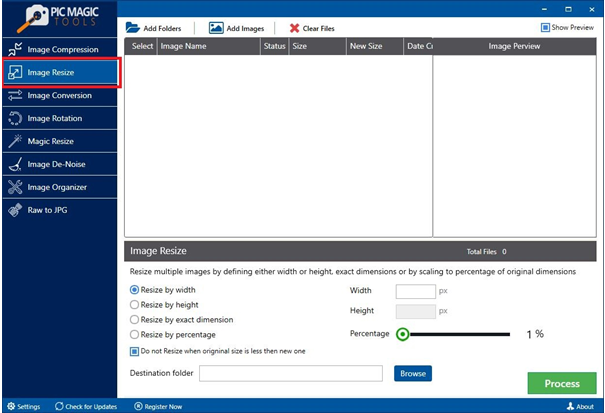
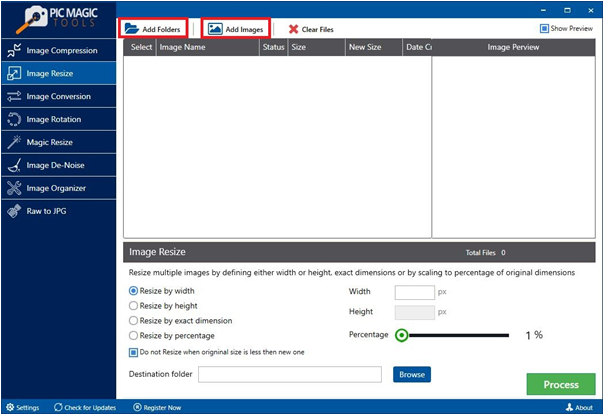
PicMagic Tools is a third-party bulk image resizer tool for windows. The bulk of images either by width, percentage, height or by giving exact dimension can be resized at once. It saves plenty of time and does not affect the original image. Follow these simple steps to change the size of images in bulk.
Step 1. Launch the PicMagic tools and then, click the “Image Resize” button located at the left corner of the tool window.
Step 2. Click Add Images button to add images or the Add Folder button to add the folder as a whole.
Step 3. All the added images selected by default. You can uncheck the image box to omit from resize.
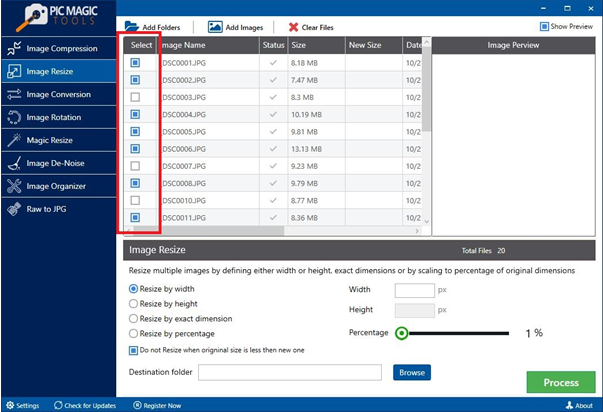
Image Preview section located at the top right corner will preview the selected image.
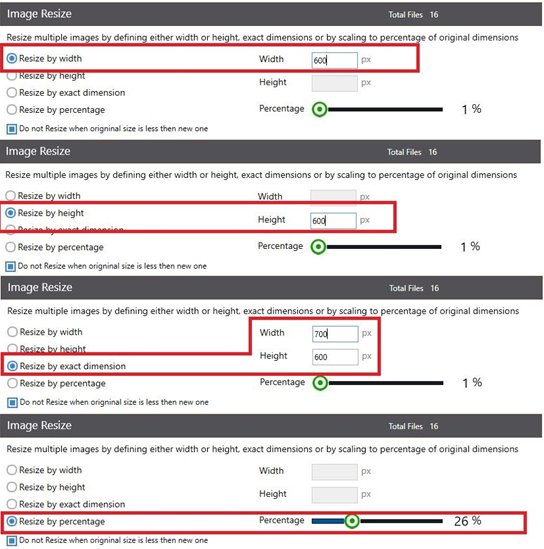
Step 4. Now, select the preferred function;
Resize the image by width (By providing the width, the height will be automatically set)
Resize the image by height (By providing the height, the width will be automatically set)
Resize the image by exact dimensions (Enter both width and height)
Resize the image by percentage (Heave the pointer on the slider to set the percentage to resize)
Step 4. Don’t forget to review the checkbox beneath the resize options.
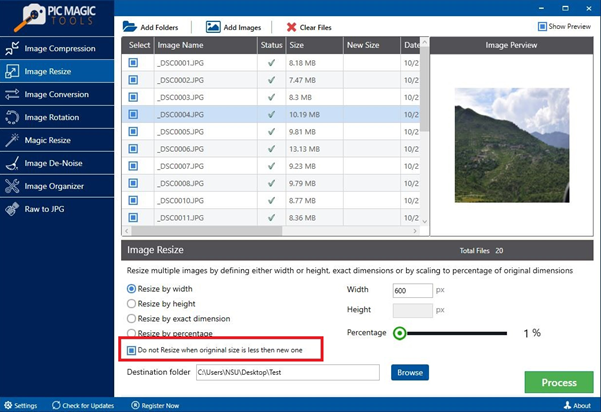
Step 5. By clicking the Browse key provide the desired destination folder.
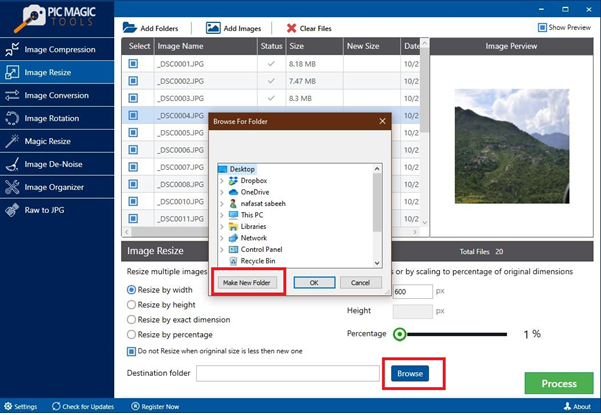
Moreover, you can generate a new folder by it as well.
Step 6. Click the Process button to proceed with the procedure.
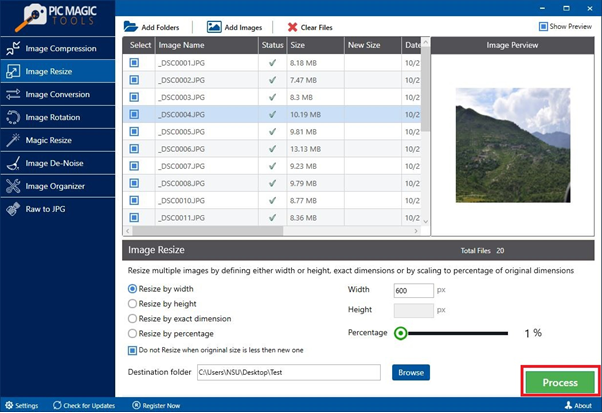
In a few moments, the process will be completed, and you will be able to see the resized images in the destination folder.