Key Points
How to Denoise photos in Windows 10
We all have observed the unlikable look in our images, that’s because of the noise in the picture. Often people do not know about the noise in the image. It was considered moral in the film years, but now in digital days, noise affects the photo critically.
In this guide, we will briefly describe the racket, when it happens, how to avoid and how to denoise a picture. Further, we will discuss the PicMagic Tools that will denoise photos more efficiently. Follow the article to get rid of noisy and gritty photos.
What is the noise in a photo?
The noise in the picture is generally known as electronic noise. Noise in the image is a variation of colour data in the photo. In other words, the noise is the deviating pixels that do not represent any colour or the exposure of the scene. Now, let’s see how noise reduction happens in a picture.
When does noise happen in Photo?
The noise happens in the picture when a person takes from the extensive exposure. That means you never go over the 100 ISO to shoot images. But sometimes you need to shoot over the 100 ISO? What will you do to avoid the noise in the image? Many pro photographers use low light for the shoot. It’s imperative to know how to deal with noise in the image and also try to avoid the racket while taking pictures. In this guide, we will provide a solution to denoise bulk images or how to reduce the clatter after the shoot.
Avoid the noise while taking Photos
You can strive to avoid the noisy images to yield storage in your device by following a few simple directions. Let’s see how to evade noise from creeping in the picture.
- Always shoot at lower ISO settings. By doing this, the noise will not creep into the image. Shooting at a higher ISO will affect your image look.
- The RAW pictures are lossless, the noise will affect any RAW photos. Therefore aim to capture photos in RAW format.
- Do not overexpose the picture. The overexposure of the image can bring the noise to the photo.
- Set the in-camera noise setting to reduce the noise.
Now, let’s understand how to reduce noise using a photo denoiser.
Denoise photos using PicMagic Tools
PicMagic Tools provide the best services to denoise a photo that looks noisy and gritty. If you want to open a noisy RAW photo, then PicMagic Tools is the solution to your problem. You can effortlessly reduce the ratio of noise from the picture most effectively and appropriately with the help of PicMagic Tools. Follow the few simple steps to denoise bulk images in PicMAgic Tools.
Detailed Steps
- Download the PicMagic Tools and install.
- Launch the App.
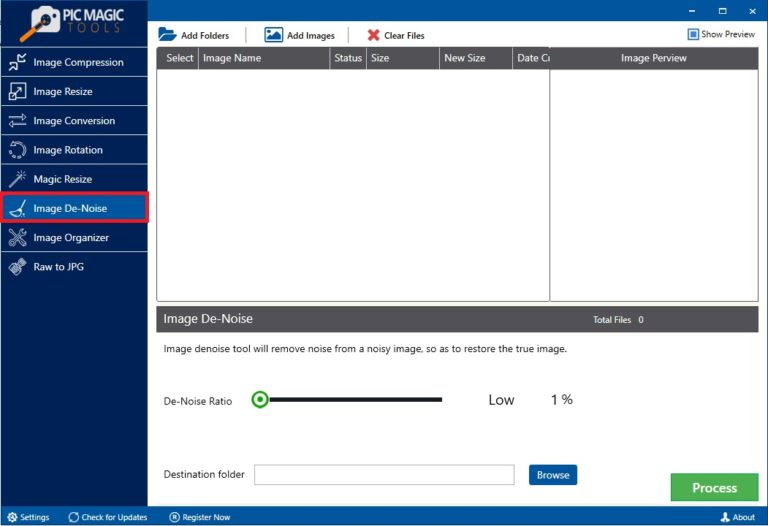
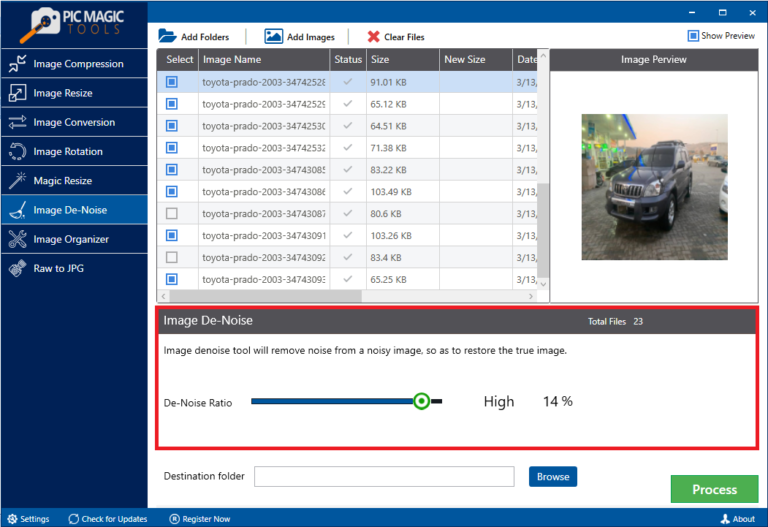
- Now, click the “Image De-Noise” button.
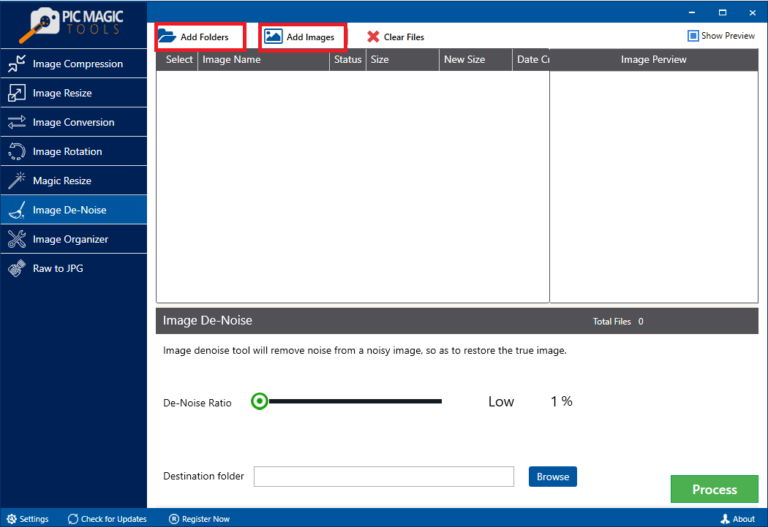
- Then, add some files to reduce the noise.
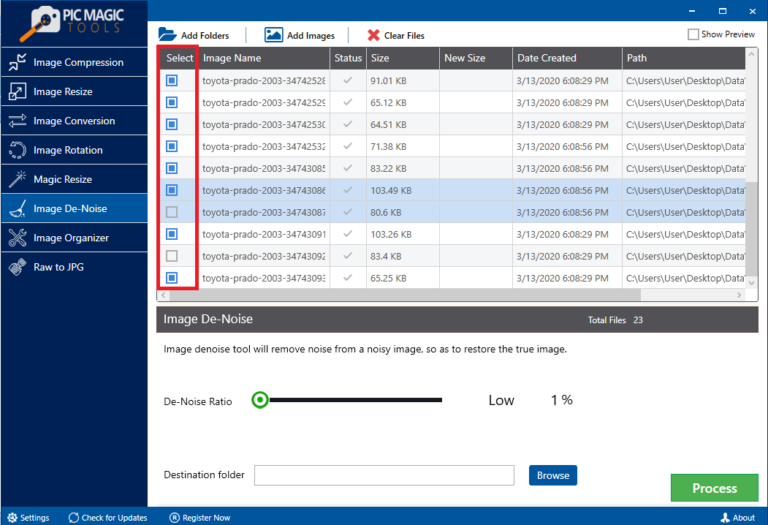
- You can unselect the images that are wrongly uploaded.
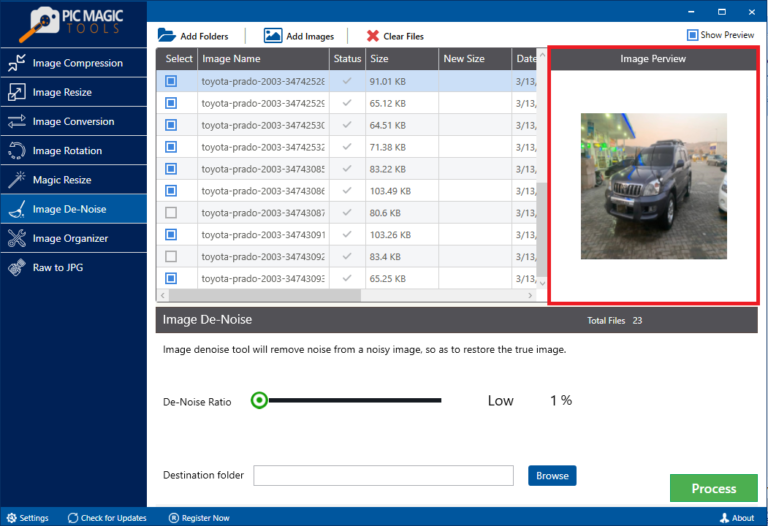
- See the image preview by clicking the “Show Preview” key.
- Now, select the desired De-Noise Ratio from the Low, Medium, or High to reduce the noise from the picture entirely.
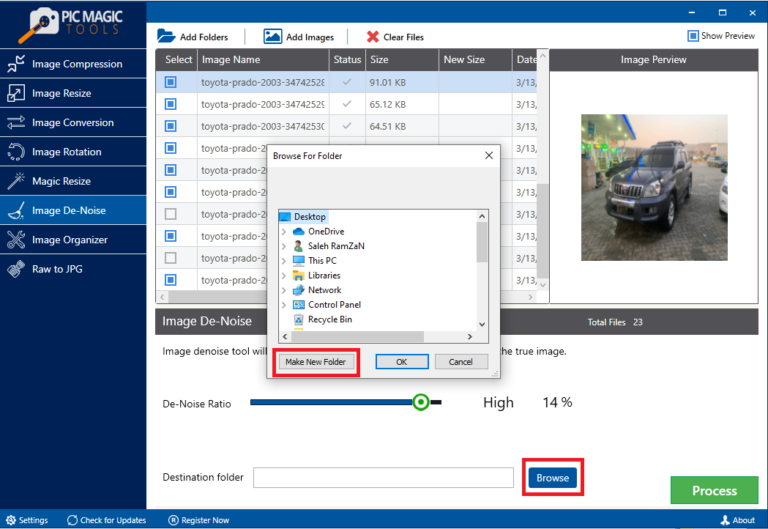
- You can also create a new folder as a destination path.
- Click the “Process” key to start the denoising of bulk images.

- Wait patiently for the process to complete. It will take a few moments to denoise the bulk images.
Conclusion
In this guide, we tried to convey the information about noise in the images, how they produce, how to avoid noise. Most importantly, how to denoise photos in windows 10 with the image denoiser to reduce unsightly noise. PicMagic Tools is a handy image denoiser to reduce the noise from a bunch of photos. You can denoise the image online, but it’s not a satisfying way of noise avoidance. Install and use the PicMagic Tools to overcome the misery of noisy and gritty images. It can reduce noise from the picture without any difficulty.