Key Points

How to Bulk Resize Images in Multiple Sizes

Images are beautiful memories, whether they are old or the latest ones. But when you want to upload an image as your profile picture and the photo does not fit the specific dimensions, then what will happen next? You will definitely look for the image resizer that can resize the picture for Facebook, Instagram, Twitter, YouTube, and google plus thumbnail resize tool.

Here, in this article, we will try to explain the best ways to bulk resize images. This guide will help you to resize the pictures using Windows 10 Mail Recipient hack and with the service of PicMagic Tools, incredible function magic picture resize.

What is Image resizing, and why do you need it?

The change in an image pixel information for example reduction in size or removal of any unneeded pixel information is called Image Resizing. Normally it is required when you need a photo for a blog post or the social media post and it does not fit on the screen. It changes the size of the image and is done by a change in two values width and height.

Nowadays, everyone must know about resizing and resizing tools because of different social media websites’ profile image sizes. For example, if you need to upload pictures for the Facebook cover photo, then you must have a Facebook profile picture resizer. 

So, let’s check the following procedures to resize the bulk images for Facebook, Twitter, and Instagram or resize thumbnails for YouTube & Google.

Resize the image using Mail Recipient Hack

Most of us do not know that they can easily resize the image using the Mail Recipient Hack. You can manually resize a bunch of photos with the help of Windows 10 File Explorer. Follow the given procedure to do the resizing job using Mail Windows 10 Mail Recipient.

  • Create a specific folder of all the pictures that you want to resize.

Mail Recipient Hack: Create Specific Folder for Images

  • Now, select all the images by pressing ctrl+A keys.
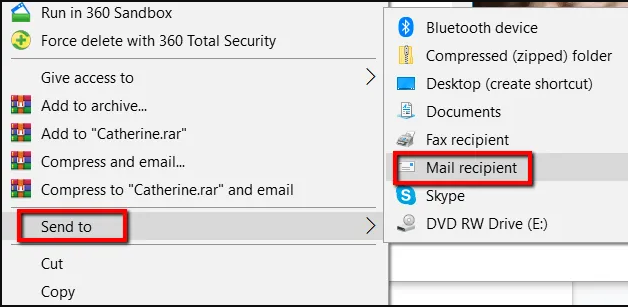
  • Then, Right-click them and Send to Mail Recipient.

Mail Recipient Hack: Select Mail Recipient Option

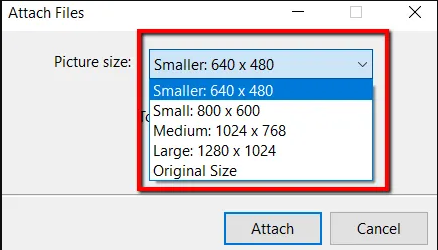
  • A new window will pop up. Here, you have to select the size of the image from Smaller, Small, Medium, or Large.

Mail Recipient Hack: Select Image Size

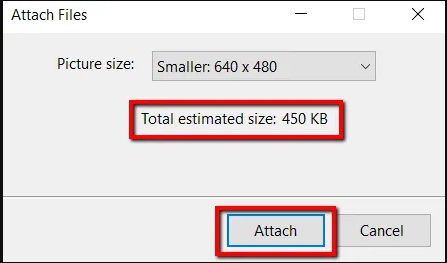
  • Now, have a sight of the total estimated size of photos and then click the Attach button.

Mail Recipient Hack: Total Size of Image

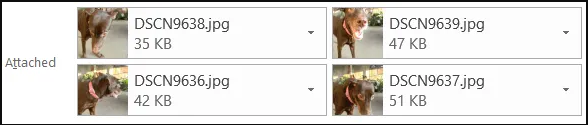
  • You will see resized images when the Microsoft Outlook will come up.

Mail Recipient Hack: Resized Images

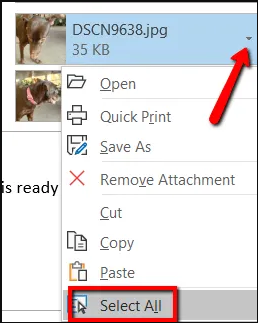
  • By clicking the arrow of a single attachment, you will see the drop-down menu. Here pick the “Select All” button.

Mail Recipient Hack: Select All Images

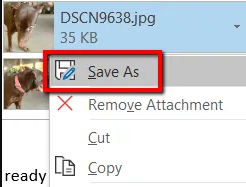
  • Then, click the arrow again, and this time select “Save As” to save the resized images.

Mail Recipient Hack: Save as

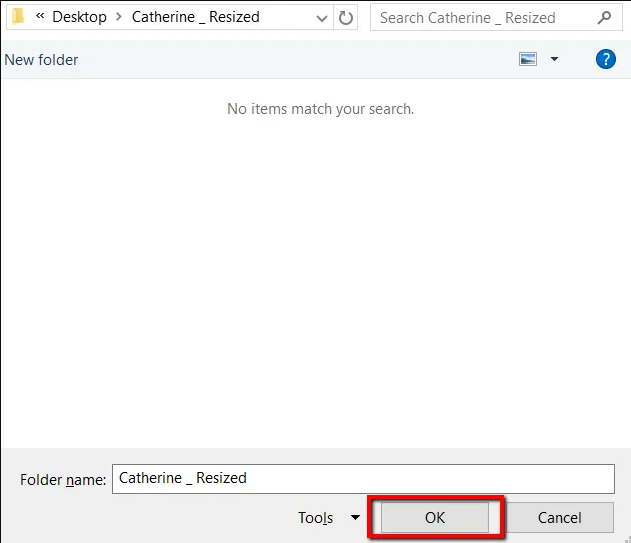
  • After that, click the OK button to finish the resizing job.

Mail Recipient Hack: Save Resized Images

That’s the whole procedure to resize the images using the Mail Recipient hack. The only downside of the Mail Recipient hack is that it takes some files to resize your pictures at a time.
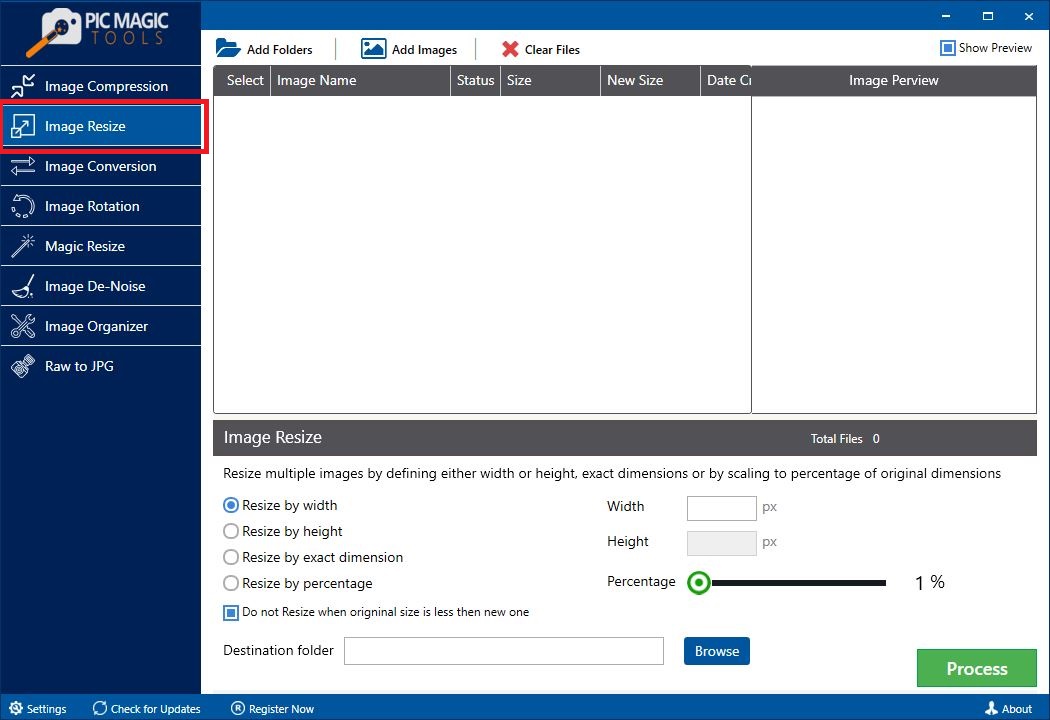
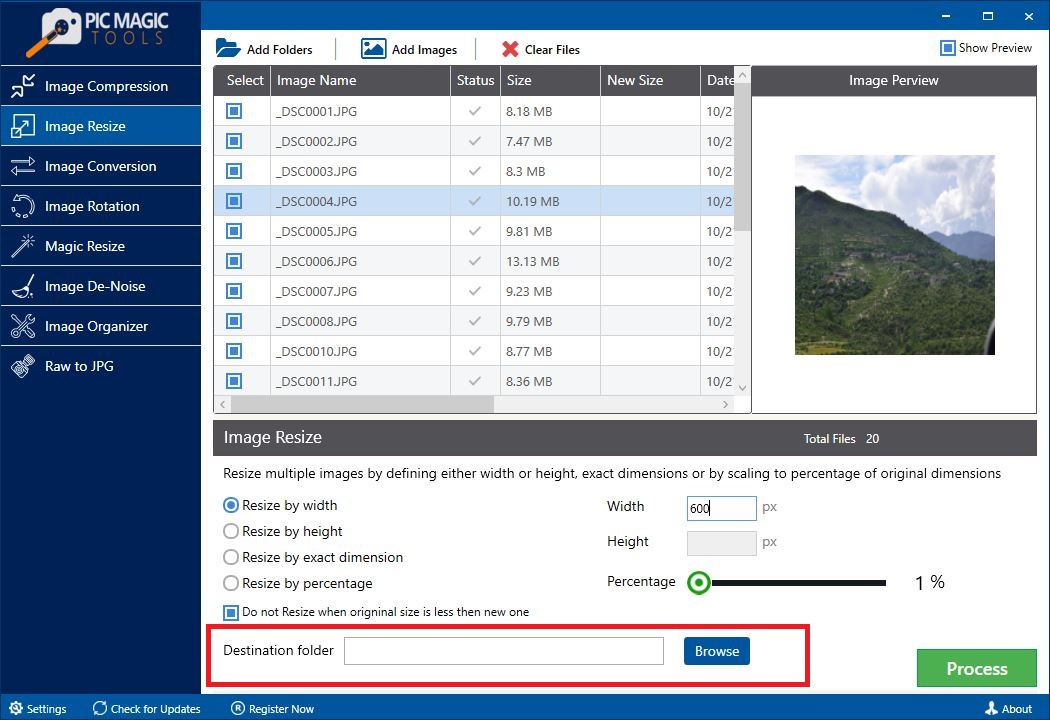
Bulk resize images into multiple dimensions using PicMagic Tools

If you want a magic picture to resize then, use PicMagic Tools to do the job effortlessly and within no time. It is a handy tool to bulk resize images. Using PicMagic Tools, you can easily resize the picture for Facebook, Twitter, or Instagram. All in all, you can resize the images for any social media platform with the help of PicMagic Tools. Follow the guide to resize the image for the Twitter header.

Detailed Steps

PicMagic Tools: Select Image Resize

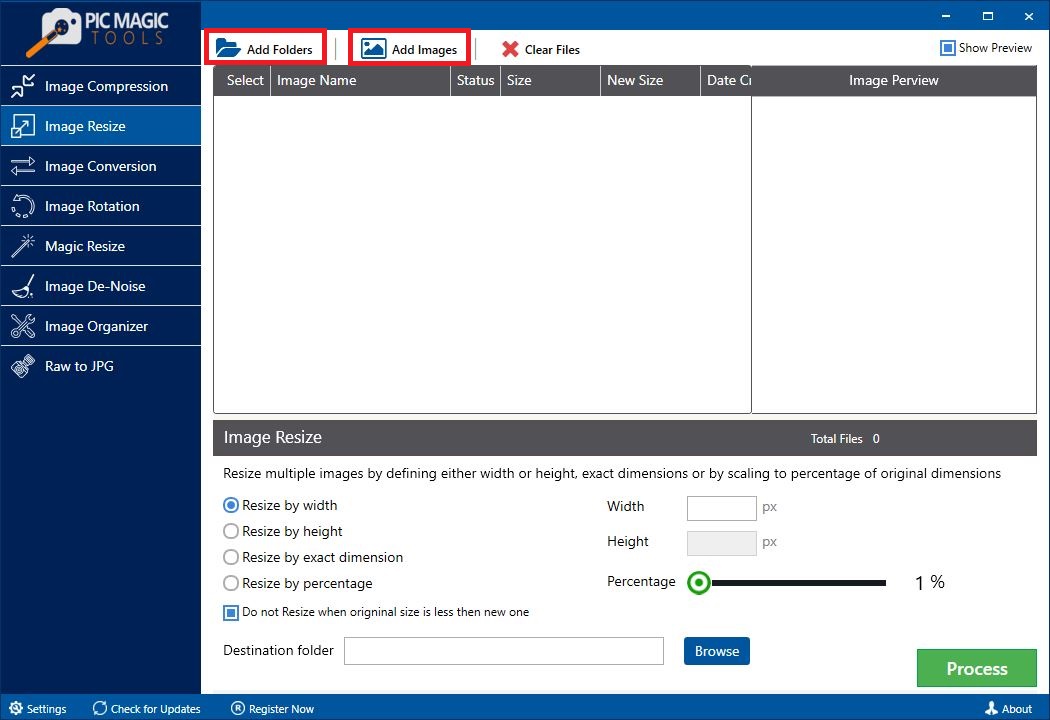
  • Now, add the images by pressing the “Add Folders” or “Add Images” button.

PicMagic Tools: Import Images

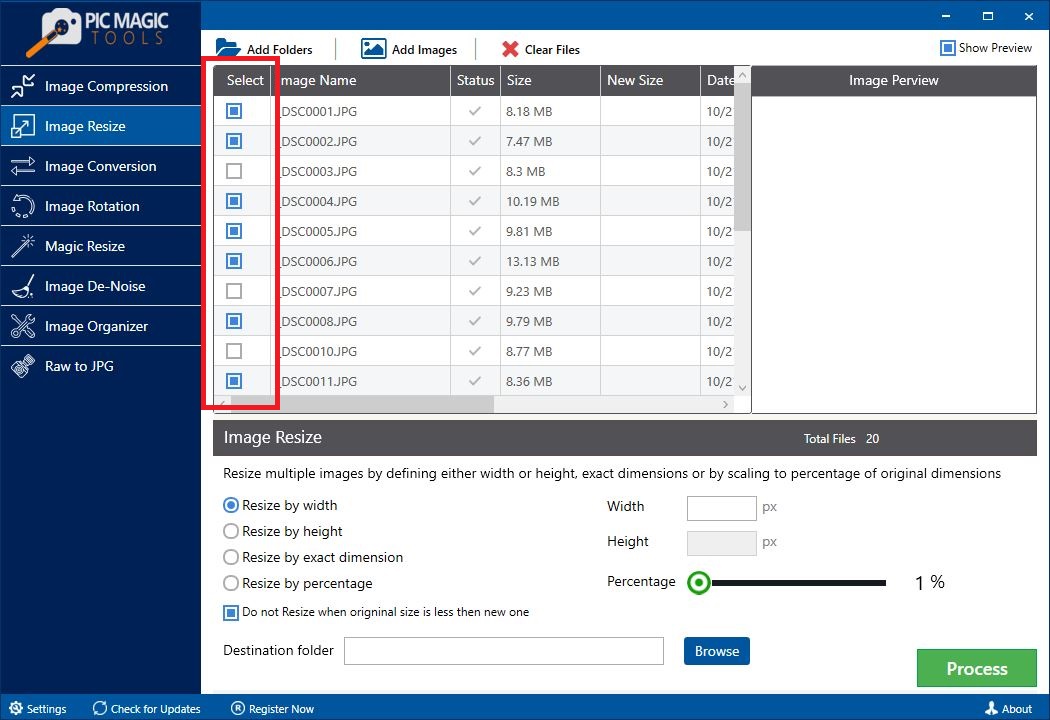
  • You can manually skip any image that you do not want to resize by unchecking that image from the list.

PicMagic Tools: Skip Images

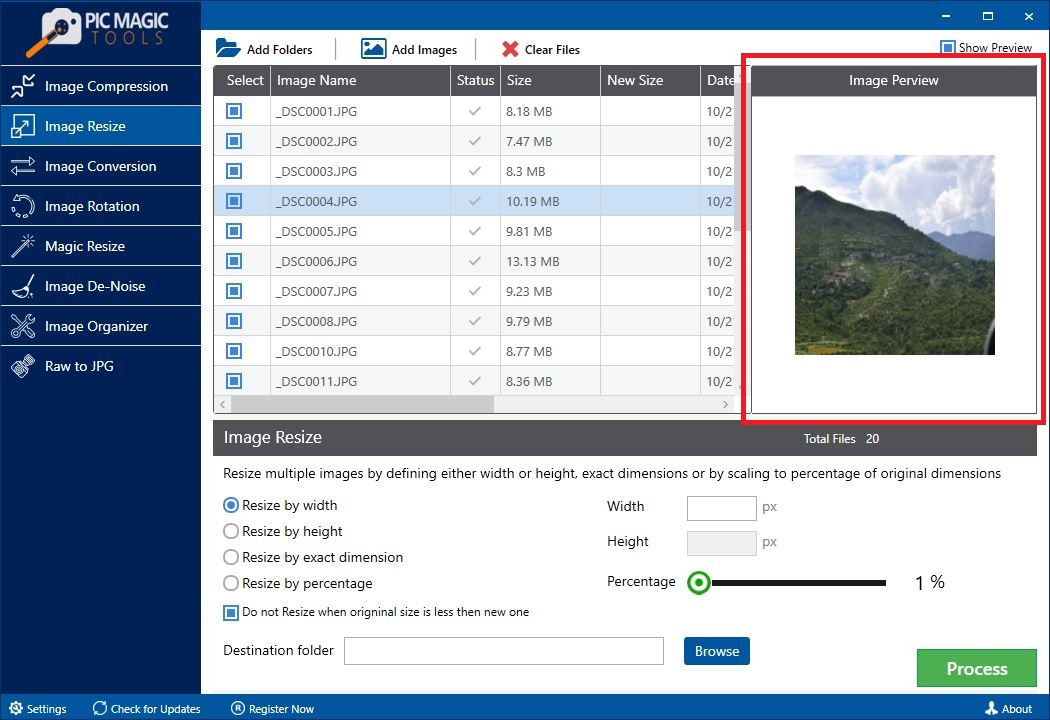
  • If you want to view the image, then check the “Show Preview” box.

PicMagic Tools: Preview Images

  • To resize the image, choose an option from the list Resize by Width, Resize by Height, Resize by exact dimension, or Resize by Percentage.

PicMagic Tools: Choose Resize Option

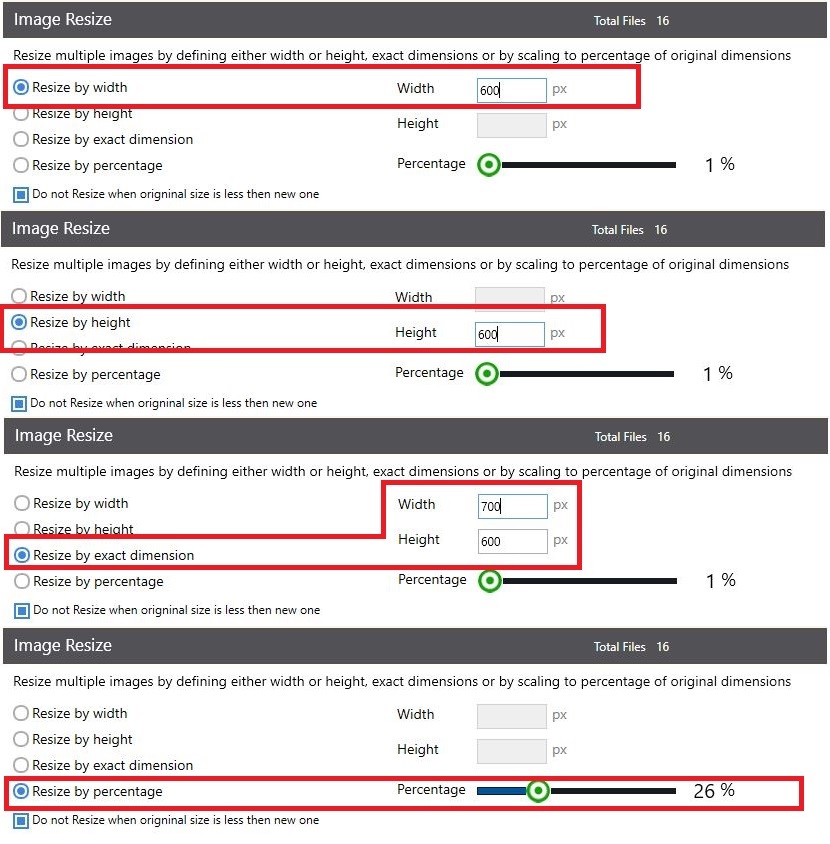
  • Now, check the box located under Resize by Percentage option.

PicMagic Tools: Check Option Don't Resize

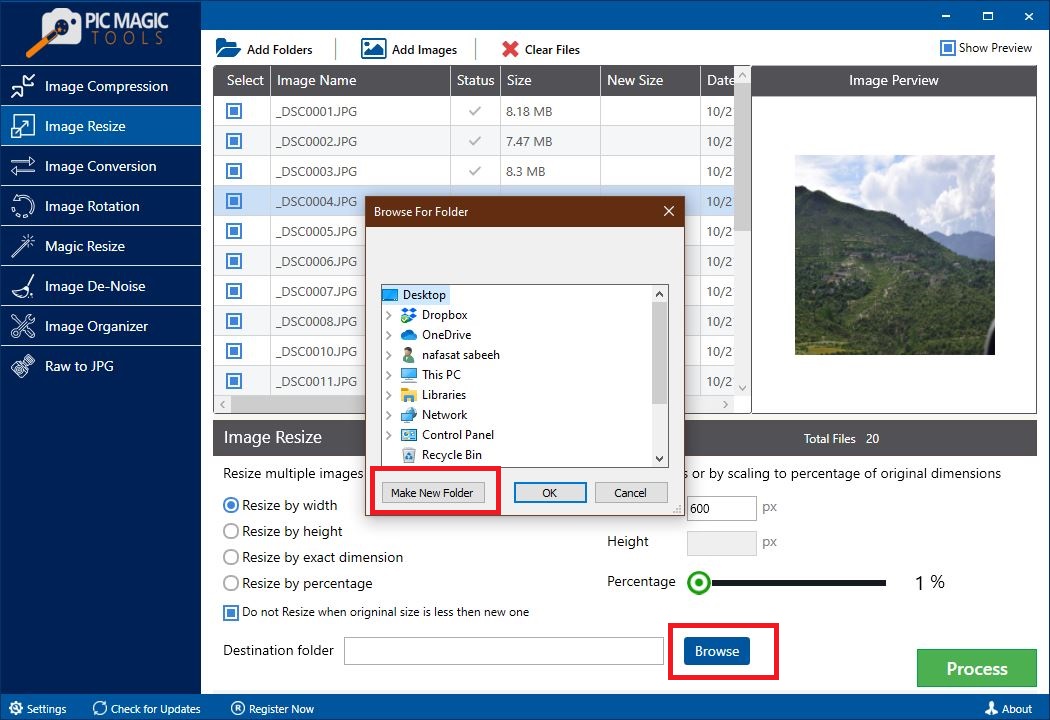
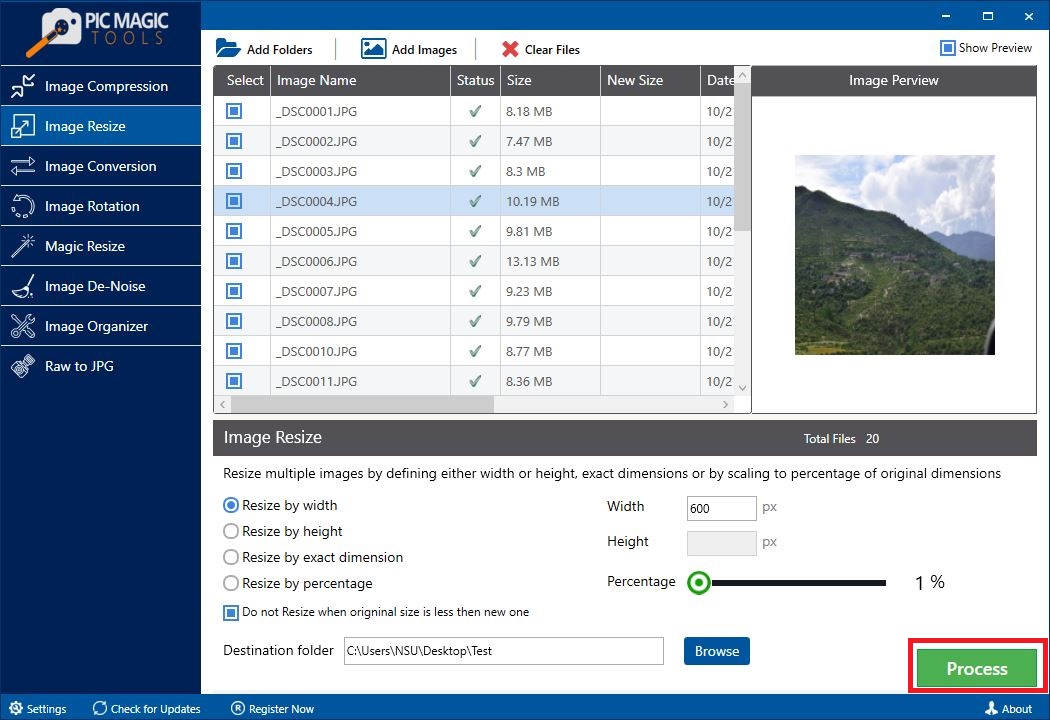
  • Then, click the “Browse” button and provide the Destination Path.

PicMagic Tools: Choose Destination Folder

  • Also, you can create a folder to provide the destination path.

PicMagic Tools: Create New Destination Folder

  • After that, click the “Process” button to kick start the resizing process.

PicMagic Tools: Start Resizing Process

  • Patiently wait for the completion of the process. It will take less time.

PicMagic Tools: Processing

Soon, you will see the bunch of resized images using the PicMagic Tools.

Conclusion

After reading this article, you can easily resize the images individually or in bulk. You can either choose Windows 10 method to resize the bulk images or the PicMgaic Tools, the Facebook profile picture resizer. In our belief, PicMagic Tools is the best resizing software for any picture. You should try PicMagic Tools to comfort the resizing task. You can easily download the software and enjoy the resizing without affecting the original quality of the image. Without any hassle, you can bulk resize images through PicMagic Tools